Like many in recent months I’ve been doing a lot more communication using web conferencing solutions. All meetings are virtual, you can’t kick a person under the table to shut them up, you get very familiar with some nostrils from their camera angles, there are some who sound like they are talking through several layers of mud.
After the first few calls I had where there were comments about the drinks cabinet behind me (and at least one person proposing to measure the height of the fluid in each bottle to see how it changed by the next meeting) I decided to change the picture. And the audio. But not the bottles.
This post will talk about my setup and its use of a few technologies to make it all seem a bit more professional. I might not use all of this capability for internal discussions with one or two other people. But I think it helps particularly when doing presentations and education sessions to customers.
Basic Picture
The first part added to my environment was a webcam mounted on a tripod. The camera can be positioned at a fixed angle and is slightly higher than the computer’s inbuilt camera. The automatic adjustment of the camera for focus seems to work well; I am not so fond of the automatic adjustments for colour balance (the picture sometimes fluctuates between too-red and too-grey) but I can live with that.
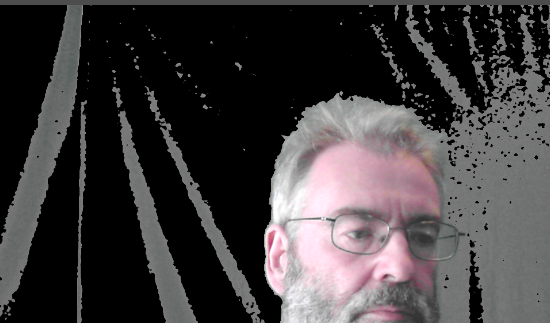
To remove the room from the picture, I started using a tool called XSplit VCam. This gives a green screen capability without actually needing a green screen – the software can distinguish the foreground and automatically remove the background to replace it with an image or video. I was surprised how well it worked, though edges were sometimes flickering which was a little annoying. While it might not show up in thumbnail images as part of a larger web conference call, it was certainly visible when my picture was the main one on someone’s screen. This is the same kind of processing that Zoom has built into its system, but most of the time I am not using Zoom.
VCam appears as a virtual webcam to other software, so tools like Zoom and Cisco Webex (the company’s preferred provider) can use it directly as the source image.
The Green Screen
I then looked for a real green screen solution. Hoping that a clean backdrop would reduce the fringe effects.
I found an Open Source program – OBS (Open Broadcaster Software) – that claimed to process green screen images. I didn’t actually own a green screen but thought I would experiment using a bedsheet taped up behind me.
That experiment was not very successful. While the sheet was definitely green, it didn’t register very clearly on the OBS picture. Even though the colour seemed fairly strong, the camera was picking it up as too pale. Adding photographic studio lighting that I had used for other projects didn’t really help, and actually made it worse at times.
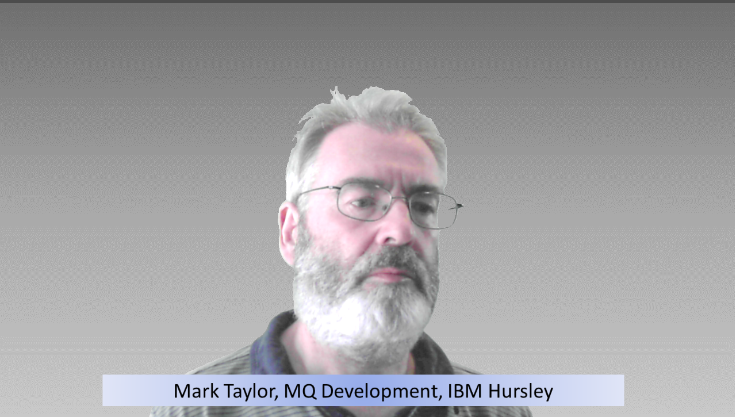
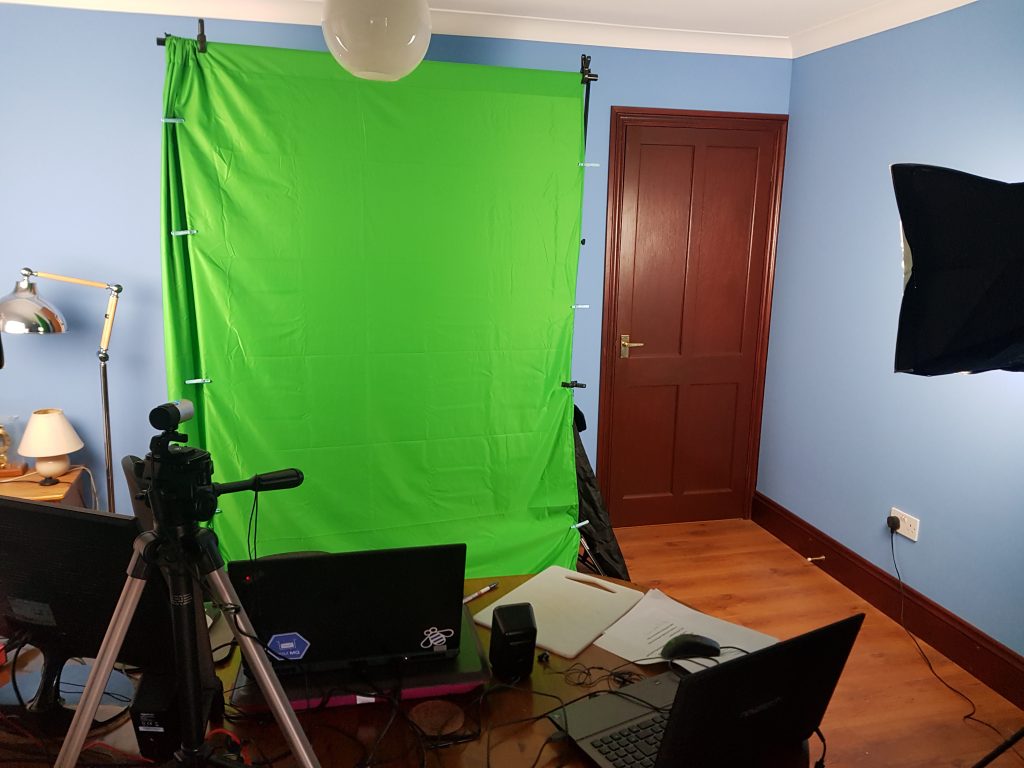
So I ended up ordering a real green screen backdrop cloth. Once that arrived and was hanging in the room, things got a lot better. OBS was able to key off the very green colour. Lighting was essential to make the backdrop a consistent shade. Without lights, the preview shows very clearly where the colour varies (such as shadows); the lights give the camera and processing a lot simpler image to work on.
One feature that was not in the default installation of OBS, but which is available as a separate plugin from the same site is the virtual webcam. Again, that is needed so that the conferencing tools can access the processed picture. The plugin can be set to always activate when OBS is started; it’s not the default setting which meant the first couple of times I tried to make calls, I couldn’t find the camera. Once I found the configuration setting, it all started to work more smoothly.
Backgrounds
Backgrounds for both OBS and VSplit can be any image or a video. I’ve collected a few different pictures to be used for different occasions.
But one thing I like about the OBS setup is that it is possible to have multiple layers and adjust them during a session. That makes it possible to add captions, and remove them after a while. One thing I’ve considered is creating a video of a scrolling set of messages for the bottom of the screen, to make it look even more like a regular news broadcast. Would not be hard, other than working out what to write in there.
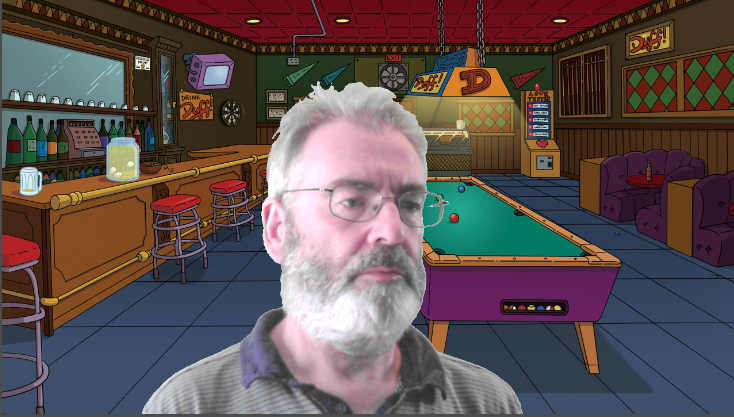
A number of TV companies have released background images that can be used. For example, there is a bunch of empty BBC sets from old sitcoms and dramas that can be downloaded. I quite liked the Porridge cell though perhaps too symbolic of being locked away. But one I use quite often is Moe’s bar.
Lights
Lighting is important to get an even colour on the backdrop. I have two studio lightboxes, one on each side of the room. The only problem with them is that even though they are low-power bulbs, the room still gets hot when they are on. So I turn them off when I don’t need to be visible on a call.
Testing has proved that the best effect comes when there’s a clear distance between the foreground and the screen. So my desk has gradually moved from the centre of the room to being nearly pressed against one wall. It does mean that the lights are behind me so I don’t get them shining directly on me – the worse effect was when one side was illuminated, looking like a bad case of sunburn.
Audio
Just as laptop cameras are not very good, so too goes the quality of laptop microphones and speakers. I am now using a Focusrite Scarlett audio interface, USB connected to the laptop, with a decent clip-on condenser mike. The box provides the phantom power needed by the mike. Having a mike attached to my shirt when I’m talking reduces the likelihood of the voice drifting off if I turn my head (something I’ve heard too often from other people). It also means I don’t have to wear clunky headset/boom devices. And having a real audio interface definitely improves quality.
For some sessions I’m doing where I will pre-record audio, then I can also use a large studio mike with suitable baffles and a pop shield.
One other thing
One thing that is irritating when attending meetings is a frequent “can everyone see that” question from the speaker. One reason for that question is because the conferencing system we mostly use does not actually show what other people can see when you are sharing your own screen. That makes sense when you only have one monitor, but it is not very good if you have two screens – you should be able to present from one and still monitor the conference on the other screen. But that is how it works.
So what I have ended up doing when I’m doing the bigger sessions is to have a second laptop on the desk, and I connect to the conference a second time (usually using a different userid to avoid confusion) and that way I can see what the lag is like when I use slides or share a video.
Summary
It helped that I already had almost all of the equipment I needed. It was also good that I have a reasonable-sized room available with space to set up screens and lighting.
While this is a long way from being a real broadcast studio, I think it has created something that looks and sounds better than the minimal capabilities built into a laptop.
This post was last updated on July 7th, 2020 at 09:43 pm
Great stuff! Now you can broadcast from Cheers and have fresh pints on the bar each time 😉 i went manual so far with a clip camera angled to upper corner of the room, where shelves cant quite ne seen. Given my mobile standup desk, this works well. But i like the green screen idea. Thx!